What Actually Matters in Off-Grid Solar Panels
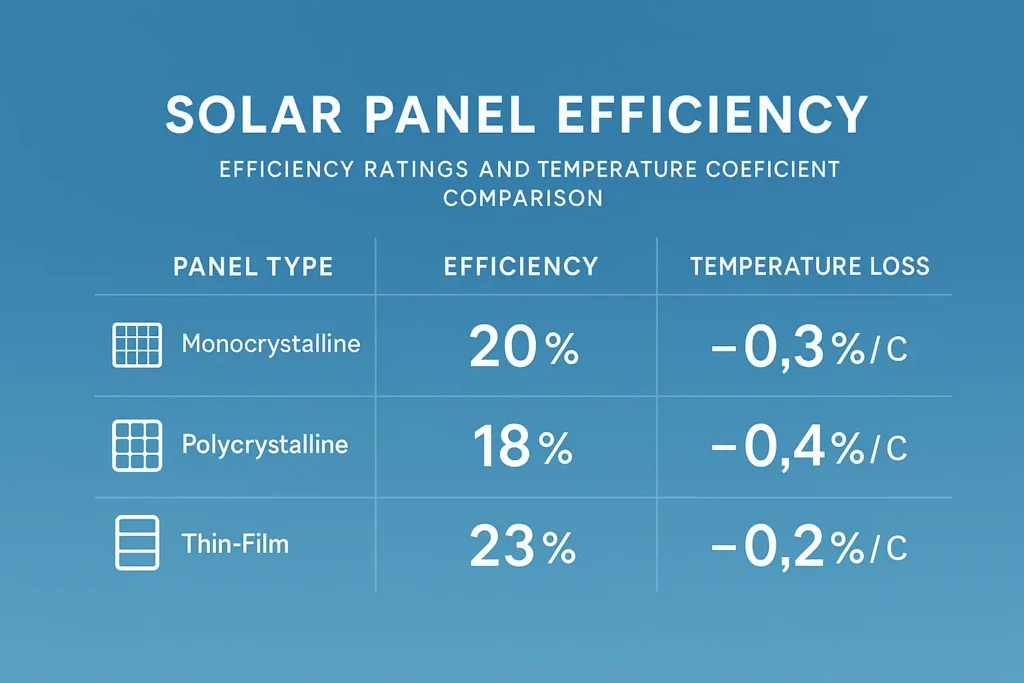
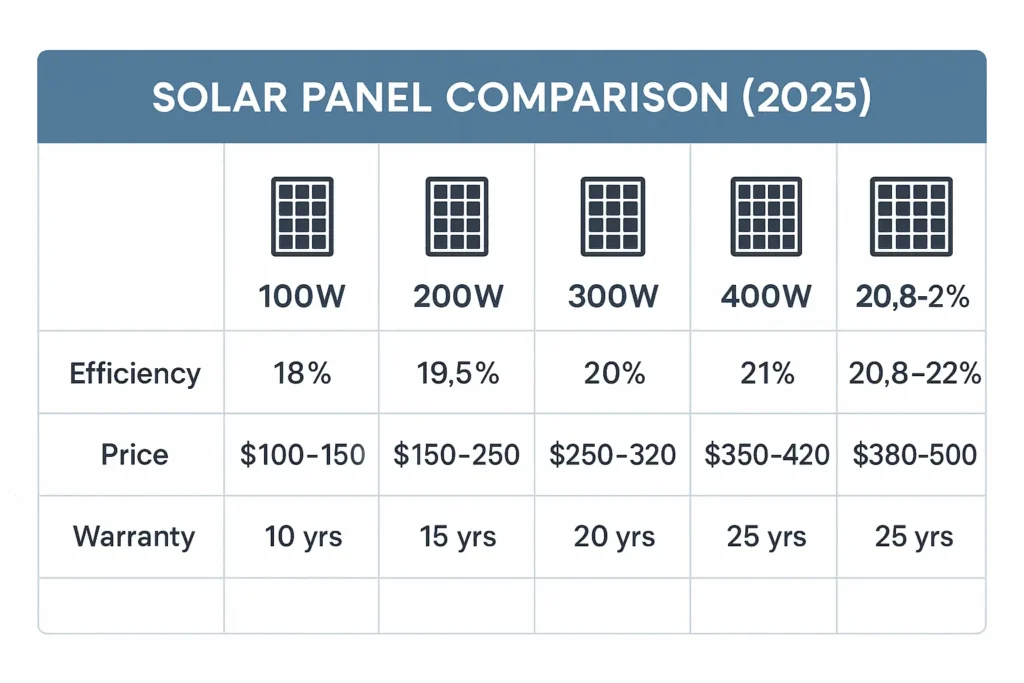
Efficiency rating gets all the attention, but it’s overrated. A 22% efficient panel isn’t magically better than a 20% efficient one for most people. What matters more is total wattage and how much space you have. If you’ve got room, slightly less efficient panels work just fine and usually cost less.
Durability is where you shouldn’t compromise. Your panels need to handle hail, wind, snow, and UV exposure for 25+ years. Look for tempered glass, aluminum frames, and junction boxes that are actually sealed properly.
Temperature coefficient matters if you’re in a hot climate. Panels lose efficiency as they heat up. Better panels drop less performance. If you’re in Arizona, this matters. If you’re in Montana, not so much.
Warranty tells you what the manufacturer really thinks about their product. Anything less than 25 years on performance and 10 years on equipment is a red flag.
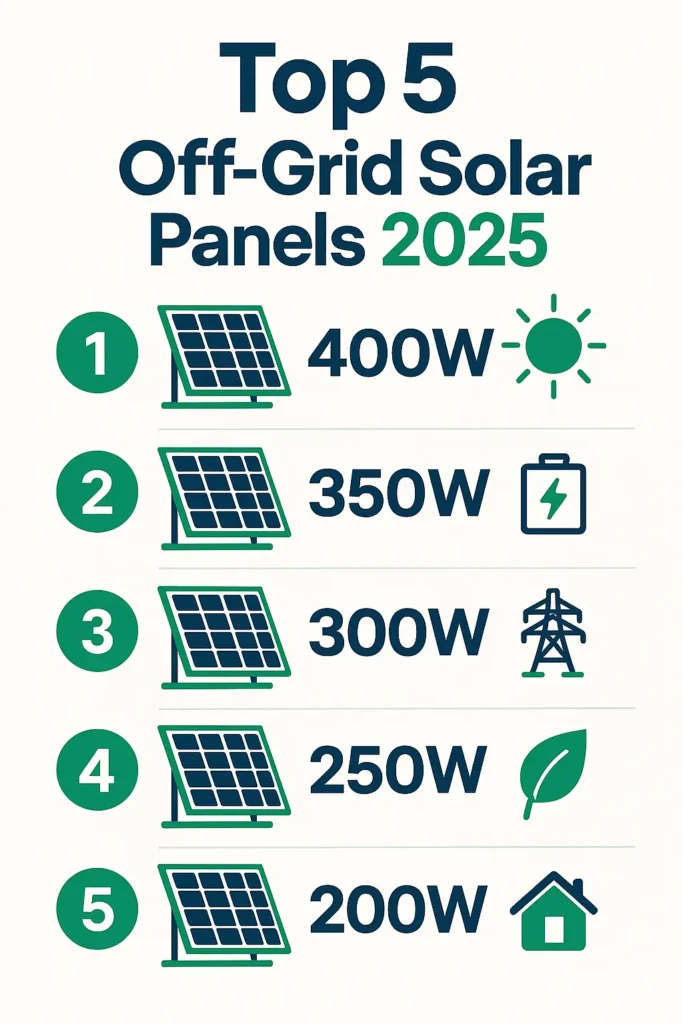
Top 5 Solar Panels for Off-Grid Systems
1. Renogy 400W Monocrystalline Panel
This is the workhorse panel most serious off-gridders end up with. Renogy’s been making panels specifically for off-grid use for years, and it shows.
The good: Solid 400W output means you need fewer panels overall. Build quality is excellent—heavy-duty aluminum frame, thick tempered glass, properly sealed junction box. I’ve had these running for two winters now with zero issues. They handle snow load without flexing, and the bypass diodes actually work when part of the panel gets shaded.
The not-so-good: They’re heavy. At 48 pounds each, you’ll want help mounting them. Also, the MC4 connectors that come with them are fine but not great—I’d swap them for better ones if you’re building a larger system.
Best for: Main array panels where you want reliable performance and don’t mind the weight. These are what I’d buy if I was starting over.
Price range: $250-300 per panel
| Spec | Value |
|---|---|
| Power Output | 400W |
| Efficiency | 21% |
| Dimensions | 82.5 x 39.8 x 1.4 inches |
| Weight | 48 lbs |
| Warranty | 25 years performance, 10 years workmanship |
2. Canadian Solar HiKu 445W Panel
If you want maximum wattage per panel, this is it. Canadian Solar makes panels for commercial installations, and their quality control shows.
The good: 445W is serious power from a single panel. That means fewer panels to buy, mount, and wire. They perform well in low-light conditions, which matters on cloudy days. The half-cell design means if part of the panel gets shaded, you don’t lose as much output as with traditional panels.
The not-so-good: These are big and heavy—60 pounds each. You definitely need two people for installation. Also more expensive upfront, though the cost per watt is actually competitive once you factor in fewer mounting brackets and less wiring.
Best for: Serious off-grid systems where you want maximum output and have a proper mounting structure. Not ideal for DIY beginners or RV setups.
Price range: $320-380 per panel
3. HQST 100W Polycrystalline Panel
Now we’re talking budget territory. Don’t expect premium performance, but these work fine for smaller systems.
The good: Cheap. You can build a basic system without dropping $2,000 on panels alone. They’re lighter and easier to handle than the big boys. For a cabin, shed, or starting out, these get the job done. I used four of these on my first setup and they powered lights, a laptop, and a small fridge without complaints.
The not-so-good: Lower efficiency means you need more of them for the same power. They don’t perform as well in marginal light conditions. Build quality is decent but not amazing—I had one where the junction box seal wasn’t great and needed some extra silicone.
Best for: Small systems, testing the waters before committing to off-grid, or supplemental power. Not for your main cabin if you’re running serious loads.
Price range: $80-110 per panel
4. Trina Solar Vertex 500W Panel
This is the new generation of high-wattage panels. If you’re building a system in 2025 and want the latest tech, this is worth looking at.
The good: 500W from a single panel is impressive. The N-type cells handle high temperatures better than traditional P-type, so if you’re somewhere hot, these maintain performance better. Trina’s been making panels forever—they’re a tier-1 manufacturer with solid quality control.
The not-so-good: Premium price. You’re paying for the latest technology. Also, these need a good mounting system—they’re large and catching wind load is real. Make sure your structure can handle them.
Best for: New builds where you want the most future-proof setup. Good if you’re planning to add more load later—you’ve got headroom.
Price range: $380-450 per panel
5. Grape Solar 270W Monocrystalline Panel
This is the middle-ground option. Not the cheapest, not the most powerful, just solid all-around performance.
The good: Good balance of price and output. 270W is enough to be useful without being unwieldy. These are common enough that finding replacement parts or adding to your system later is easy. Decent efficiency, good temperature coefficient, and they’ve been making this model for years so the bugs are worked out.
The not-so-good: Nothing really stands out. They’re just… good. If you want bragging rights about your 500W panels, look elsewhere. But sometimes boring and reliable is exactly what you need.
Best for: Expandable systems where you might add panels over time. Good for the “start small, grow as needed” approach.
Price range: $180-230 per panel
How to Actually Choose Your Panels
Here’s the process I’d follow if I was starting fresh today.
Step 1: Calculate your power needs. Don’t guess. Add up what you actually use. Fridge runs 24/7, lights for 5 hours, laptop for 8 hours—do the math. Then add 25% for losses and future growth. If you land at 6 kWh per day, that’s your target. Need help with the math? Check out our solar panel calculator guide.
Step 2: Check your sun hours. Look up peak sun hours for your location. Most places in the US get 4-6 hours. If you get 5 hours and need 6,000 Wh per day, you need 1,200W of panels minimum. Better to oversize by 20-30% for cloudy days.
Step 3: Consider your space. If you’ve got unlimited roof space, go with cheaper panels and just install more. If space is tight, pay up for high-wattage panels. Simple math.
Step 4: Think about expansion. Will you add more load later? Get panels you can find again in a few years. Going with some obscure brand that might disappear makes expansion harder.
Step 5: Match to your system voltage. Most off-grid systems run 24V or 48V. Make sure your panel configuration works with your charge controller and inverter. This isn’t complicated, but it matters.

Common Mistakes People Make
Buying based only on efficiency. I see this all the time. Someone drops $5,000 on 23% efficient panels when 20% panels would’ve worked fine for $3,000. Unless you’re seriously space-constrained, this is wasted money.
Undersizing the array. People calculate their power usage on a sunny day in summer and size their system accordingly. Then winter hits, or you get a week of clouds, and suddenly you’re running your generator constantly. Always oversize.
Mixing panel types. Don’t put 300W panels in series with 400W panels. Don’t mix monocrystalline and polycrystalline. Keep your strings matched. Your charge controller will thank you.
Ignoring wind load. Those big 500W panels catch wind like a sail. I’ve seen DIY mounting systems literally rip off roofs in storms. If you’re going big panels, do the mounting right.
Skipping the bypass diodes check. Some cheaper panels skip bypass diodes or use cheap ones. When part of your panel gets shaded, diodes prevent the whole string from dropping output. Make sure they’re there and working.
Installation Tips That Actually Matter
Mount your panels at the right angle for your latitude. Google it, tilt them correctly. In winter, you might want a steeper angle to shed snow and catch low sun. In summer, flatter works better. Some people go with adjustable mounts—more work but optimizes for seasons.
Leave space between panels and the roof for airflow. Panels run cooler, perform better. Two inches minimum. I’ve seen setups mounted flush to metal roofs that get so hot the panels derate 15%.
Use quality mounting hardware. The rails, brackets, bolts—don’t cheap out here. Your panels will be up there for 25 years. Spend the extra $200 on stainless steel hardware instead of replacing everything in five years when it rusts.
Wire properly. Use the right gauge wire for your current and distance. Too thin and you’re losing power to resistance. MC4 connectors should click firmly. Bad connections cause fires or just make your system underperform for years without you realizing why.
Ground everything correctly. Seriously. Lightning strikes happen. Proper grounding can save your whole system. This isn’t where you improvise.
What About Portable/Flexible Panels?
Quick take: they’re fine for RVs, camping, or temporary setups. Don’t use them for permanent installations.
Flexible panels sound great—light, easy to mount, you can stick them to curved surfaces. But they run hotter than rigid panels because there’s no air gap underneath. They degrade faster. The efficiency is usually lower. And they cost more per watt.
If you need portable power, go for it. If you’re building a cabin setup, stick with traditional panels.
Do You Really Need Microinverters?
Probably not for off-grid. Microinverters are great for grid-tied systems with shading issues, but most off-grid setups use charge controllers and battery banks. You’re dealing with DC voltage until it hits your main inverter.
That said, if you have serious shading issues—trees you can’t cut down, weird roof angles—panel-level optimization might be worth it. But it adds cost and complexity. I’d try to solve the shading problem instead.
Maintenance Reality Check
Solar panels are low maintenance, but not zero maintenance. Here’s what you actually need to do.
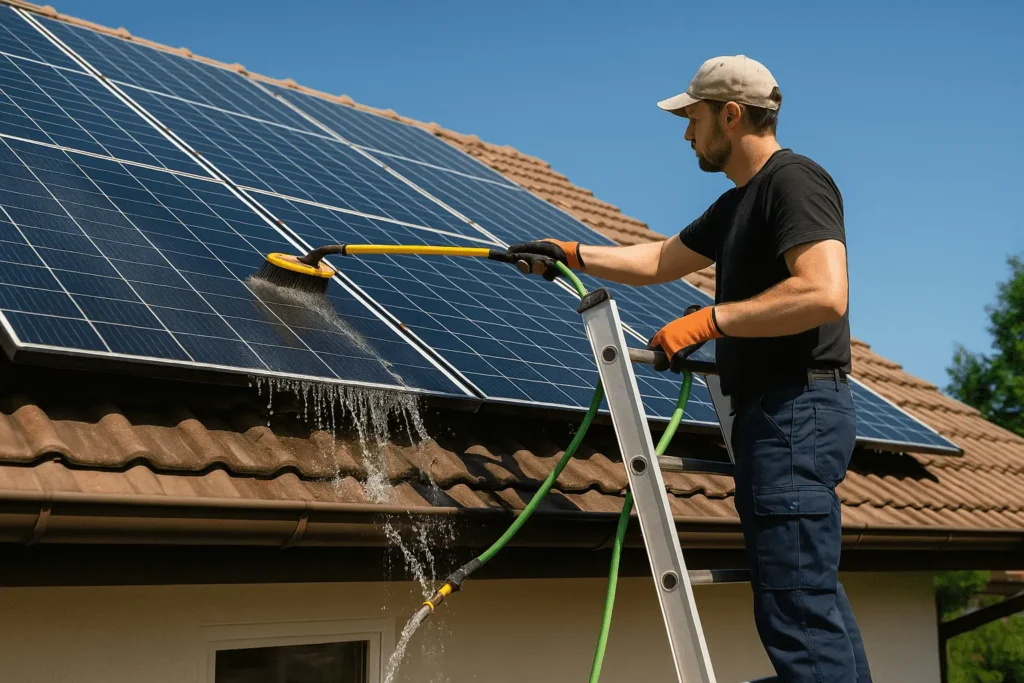
Cleaning: Dust, pollen, bird droppings—they all reduce output. In dry climates, you might need to spray them down every few months. I just use a hose and a soft brush. Don’t use abrasive cleaners or you’ll scratch the glass. Our panel cleaning guide has the full process.
Snow removal: Depends on your angle and climate. Steep enough and snow slides off. Flat and you might need a roof rake. Don’t let snow pile up for weeks—you’re losing power and adding weight.
Inspection: Walk around twice a year and look for cracks, loose connections, water in junction boxes, or damage to wiring. Catch problems early.
Monitoring: Watch your output. If it drops suddenly, something’s wrong. Could be a bad connection, a failing panel, or just dirty glass. Don’t ignore it.
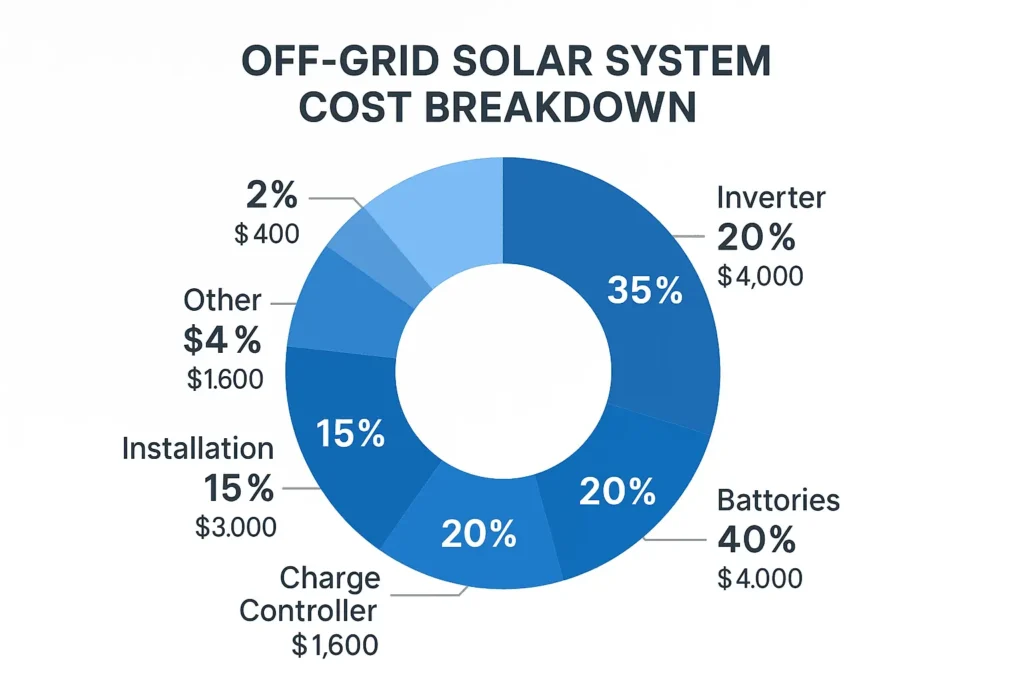
The Real Cost of Going Solar Off-Grid
Let’s talk money because nobody else gives you straight numbers.
For a basic off-grid system powering a small cabin (6-8 kWh per day), you’re looking at:
- Panels (2,000-2,500W): $1,200-2,000
- Charge controller (MPPT 60A): $400-600
- Batteries (400Ah lithium): $2,000-3,500
- Inverter (3,000W): $800-1,200
- Mounting and wiring: $500-800
- Misc (breakers, disconnect, etc.): $200-400
Total: roughly $5,000-8,000 for a working system. More if you want backup generator integration, bigger battery bank, or higher loads.
That’s DIY pricing. Hire someone and double it. But a lot of people can handle this themselves if they’re careful and willing to learn.
If you’re wondering about battery costs specifically, our solar battery storage guide breaks down the real numbers for lithium vs lead-acid options.
My Honest Take on Each Panel Type
If I was building a system today and money wasn’t the only consideration, I’d go with Renogy 400W panels. They’re the sweet spot of price, performance, and reliability. You can find them easily, they’re built well, and the company actually supports them.
If I had more budget and wanted maximum wattage, Canadian Solar 445W panels are excellent. Just make sure your mounting can handle them.
If I was on a tight budget or testing things out, HQST 100W panels are fine. Start with a few, see how it goes, add more as needed.
The Trina 500W panels are impressive but you’re paying a premium for the latest tech. Worth it if you need maximum power density. Not necessary for most people.
Grape Solar 270W panels are good for expandable systems. Nothing fancy, just reliable mid-range panels that get the job done.
Questions People Actually Ask
Can I mix different wattage panels?
You can, but don’t put them in the same string. Your charge controller will limit the whole string to the lowest panel’s output. Use separate strings for different panels.
How long do solar panels really last?
Good panels will still produce 80-85% of their rated output after 25 years. Cheap panels might drop faster. I’ve seen 15-year-old quality panels still going strong.
Do I need tracking systems for off-grid?
Probably not. Trackers are expensive, add moving parts that break, and only increase output 15-30%. It’s usually cheaper to just buy more panels. Unless you’re seriously space-limited, fixed mounts are the way.
What about hail damage?
Quality panels with tempered glass handle hail up to 1 inch pretty well. I’ve been through several hailstorms with zero damage. Cheap panels with thin glass are more vulnerable. Check your warranty—good ones cover hail damage.
Should I clean my panels regularly?
Depends on your area. If you’re in a dusty climate or under trees, yes. Otherwise rain handles most of it. I clean mine twice a year and when I notice output dropping.
Can I expand my system later?
Yes, but easier if you plan for it. Leave extra capacity in your charge controller and inverter. Make sure you can find the same panels or compatible ones. This is why going with major brands matters—they’ll still be around in five years.
What if a panel fails?
Replace it. Most failures are junction box related or from physical damage, not the cells themselves. If it’s under warranty, contact the manufacturer. If not, you’ll need to replace it or work around it.
Final Thoughts
Picking solar panels isn’t complicated once you cut through the marketing. Figure out your power needs, match the panels to your budget and space, and go with a reputable brand that’ll be around for warranty support.
Don’t overthink efficiency ratings. Don’t under-buy your array size. Don’t cheap out on mounting hardware. Do plan for expansion. Do oversize your system by 20-30%.
The panels I use are Renogy 400W because they work, they’re available, and I trust them to still be producing power 20 years from now. But whatever you choose, make sure it fits your actual needs, not what some sales page tells you.
Going off-grid is worth it. Just don’t make it harder than it needs to be by overthinking the panel choice. Pick good ones, install them right, and move on to figuring out your battery maintenance routine—which honestly matters way more than which panels you chose.
If you’re just getting started with off-grid living, check out our complete beginner’s guide to going off-grid. It covers everything from planning to execution.

Lio Verdan writes about solar energy, off-grid living, and eco-innovation through Gridova Living — a platform dedicated to energy freedom and sustainable technology.